Weaving Magic: Exploring Forest School Weaving Activities
Fine motor skills? Check. Creativity? Check. Using what you already have to make a fun forest school activity available? Check!
Weaving is an engaging, hands-on experience that can help children explore their environment while developing important skills. In this article we’ll talk about what forest school weaving is, how to set up the frame and activities and assessing outcomes from these activities.
So grab some materials (you don’t need anything special) and get ready – let’s dive into the wonderful world of forest school weaving!
What is Forest School Weaving?
Weaving in a forest school setting is all about threading materials through a frame to make a ‘fabric’. It’s an activity that encourages children to explore their creative side while being outside. It involves using natural materials such as sticks, nettles, vines, and grasses to create patterns and shapes on the loom.
This activity can be used in both formal and informal settings, and you could make it available indoors or in a shelter or outdoor classroom at a push.
We have (had – more on that later) a permanent weaving frame set up at our preschool area.
The weaving process requires concentration and patience which helps develop problem-solving skills in children. It also encourages exploration of different textures as well as creativity when designing unique projects with these materials.
Materials Needed for Outdoor Weaving
To get started on a forest school weaving activity, you will need:
- Somewhere to make the weaving frame. We set up ours between two small trees.
- Long sticks as frame boundaries and supports.
- Twine or string to make the base warp and weft.
- Scissors or pruning shears for cutting materials
- Various types of natural materials like grasses, bracken, small twigs and so on for threading and weaving to make the patterns. The children can find these themselves if you are in an area with plenty of natural resources.
Setting Up a Forest School Weaving Activity
So how do you get started? Here’s how we set up our forest school weaving area.
1. Prepare the Space and Materials
Gather your materials and find the right place to create your weaving frame. You don’t want the frame space to be so big it dominates the area, but it should be big enough for several children to work at it together. They’ll want access to the front and back of the frame at the same time, so you should be able to walk all the way around it.
Pick an area that is sheltered from the wind.
2. Create the Frame
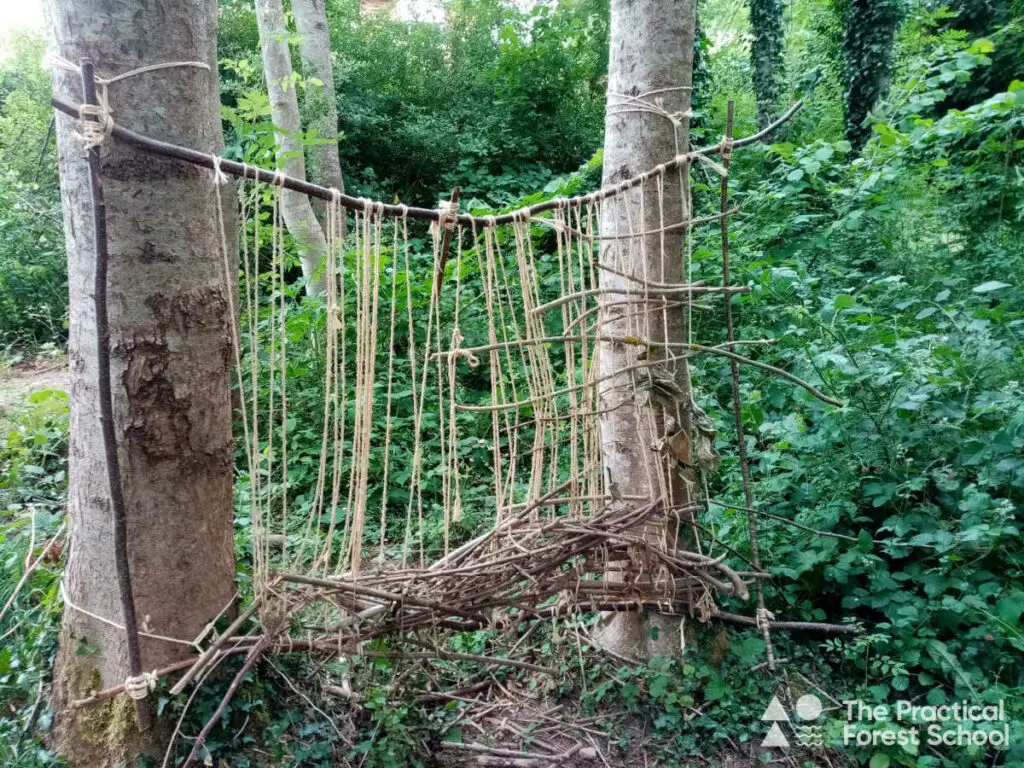
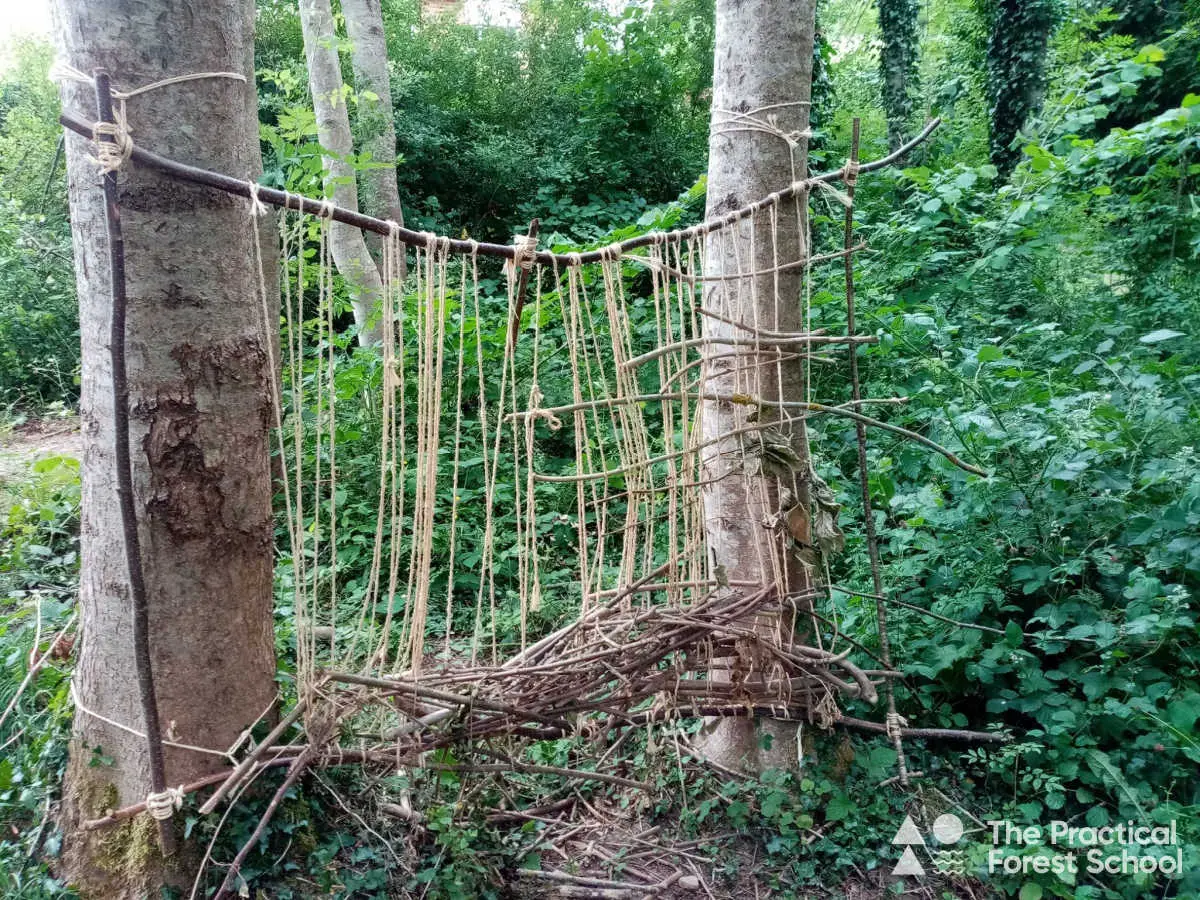
We made ours by using square lashing to create a frame from 4 long thin branches at a size that fitted between two trees.
Then the frame was secured to the trees.
You do need strong branches top and bottom as these are the ones that your weft threads are going to be wrapped around. They need to be able to sustain a fair bit of pushing and pulling.
You can see what I mean in the photo below, although note that it is a picture of after the weaving frame was broken, so you’ll have to consider what it looked like when it was first made!

The challenge of using a public space for our preschool sessions is that structures like this are available for anyone to use, and sometimes they are not used in a respectful way.
3. Add the weft
Next, add the weft threads. We ran twine up and down between the top and bottom edges of the stick frame. Wrap the threads around the sticks several times to stop them sliding up and down the frame. Or cut and re-tie each weft, whatever works for you.
4. Offer the Activity to Children
In our experience, children pick up what they can do with the frame quickly. If they show interest in the frame, you can demonstrate how to weave through the weft to create patterns. Then leave them to it!
As children begin working on their projects, provide guidance as needed but allow them plenty of freedom when it comes to creating something unique from start to finish without too much interference from the adults around.
Ask questions about what they are doing as well as why they chose certain colors or patterns in order to help foster critical thinking skills related not only to weaving but problem solving in general, which will be beneficial later on in life.
If the children seen really interested in weaving, you could also consider the following activities:
- Making dream catchers
- Making wall hangings
- Or even making mats or basket weaving for older kits, or any simple willow crafts.

Benefits of Weaving in a Forest School Setting
Weaving activities offer numerous benefits for children’s development including improved fine motor skills from manipulating small objects; increased hand-eye coordination; enhanced spatial awareness; greater understanding of how nature works through observation; plus opportunities for collaboration with peers during group projects.
Additionally, this type of project allows kids to express themselves creatively while having fun outside!
How to Incorporate Nature into Your Weaving Activities
Using natural materials in your projects is a great way to incorporate nature into weaving activities. Gather items from the outdoors such as sticks, leaves, grasses, flowers and pinecones for use in weaving.
You could also encourage children to explore their environment by looking for interesting textures and colors that they can add to their projects.
Connecting with nature through storytelling and imagination is yet another way to incorporate it into weaving activities with children.
And if you have to incorporate some curriculum-led activities into your sessions, this is the perfect activity for the Ancient Greece topic. Arachne’s story incorporates weaving, and it also links to history, fashion and culture topics.
Assessing Learning Outcomes from Forest School Weaving Activities
Assessing learning outcomes from forest school weaving activities begins with observing and documenting progress.
Note the different stages that children go through when engaging in a weaving activity, such as their initial enthusiasm, the level of difficulty they encounter while working on the loom, or any ah-ha moments and breakthroughs they experience along the way.
Taking photos or videos can be helpful for capturing these moments and providing evidence for your portfolio or school observations if these are required.
Reflect after each session on your own performance as a leader too. What worked with the activity? Who engaged with it? Is it worth offering again? Would offering it again at a different time of year create a different experience?
Will you have a go at creating a weaving activity in your forest school sessions?

About the author: Jon Borley
Jon qualified as a Level 3 Forest School Leader with the Sussex Wildlife Trust. He works independently as a practitioner running forest school clubs and also within schools both in a forest school capacity and as an outdoor learning teaching assistant, working with preschoolers to secondary-aged children. He has previously led sessions for adults as part of professional development events for the Sussex FSA, and is a member of MIAS.
